# Cursor Ripple Effect
The Cursor Ripple effect allows you to apply a liquid ripple effect to an image layer that only becomes visible when the mouse cursor of a user hovers over it. The effect uses a collision mask so that you can limit it precisely to certain parts of your images.
# Effect Settings
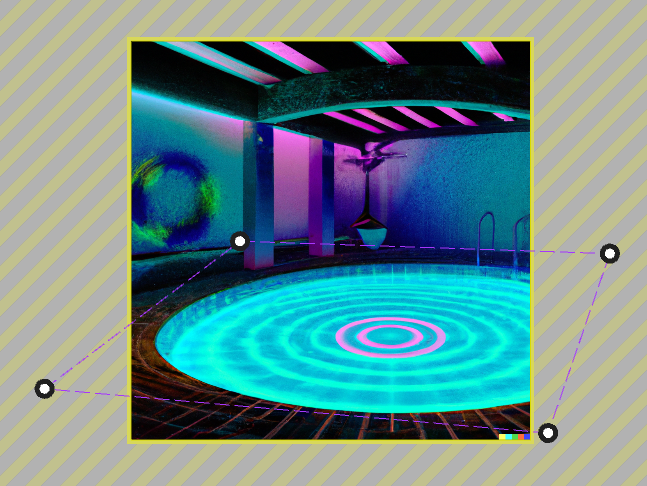
- Perspective: When enabled, you can re-adjust four points on your image to adjust the perspective of the effect. This makes sense whenever your image is not a top-down view. This allows Wallpaper Engine to adjust the effect to the angle of your image, see an example below.
- Reflection: When enabled, the ripple effect will reflect other surfaces of your image.
- Shading: Adds a high and low colored tint to the ripple effect, you can further configure the shading colors down below in the property list when this option is enabled.
- Collision mask: The collision mask determines all areas in which the effect is not active. If you only want to apply the effect to some parts of your image, you need to paint all areas in which the effect is disabled. Note that the painted collision mask does not support smooth transitions, so changing the Hardness does not have an effect.
- Ripple decay: Determines how fast the water ripples fade away.
- Ripple speed: Determines the speed of the water ripples.
- Ripple strength: Determines the strength of the water ripples. If you see artifacts and outlines of other objects around your desired area, try decreasing the ripple strength.
# Perspective Example
We recommend enabling the Perspective option and adjusting the perspective points for this effect whenever the image is not a straight top-down view of the water surface that you want to animate. Depending on the image, this can significantly improve the effect as it removes unintended reflections and will ensure that the water effect moves in a proper angle.
Setting this up is rather simple, first enable the Perspective option, then re-adjust the four points on the screen so that they move along the surface on your image. Take the following example where we adjusted the perspective points to roughly match the angle of the ground floor: