# Iris Movement Effect
The Iris Movement effect allows you to add motion to the eyes of a character. This effect will make your character gaze around realistically in a random manner. In order for this to work, you should start by adding an opacity mask to the eyes of your character. Depending on your specific image, try to make a soft transition from the iris/center to the border of the eyes to improve the results of the effect.
# Effect Settings
- Background: Enabling this option will make the effect use the background color for parts of the eye that are invisible on the picture, but become visible when the eye moves. Disabling this option will make the effect distort the eye at the borders instead of using a solid color. Having this option enabled can be useful for animating eye movements, disabling it is especially useful for animating more overall movement such as head movements.
- Background color: The color to be used for invisible parts of the eye that become visible when it moves.
- Opacity mask: Use the opacity mask to limit the motion to the eyes.
- Speed: The speed of the iris movement.
- Scale: How much the iris moves horizontally and vertically. In many cases you may want to reduce the vertical movement only since eyes are typically much wider than they are high.
- Noise amount: The amount of constant motion that is added on top of the erratic gaze movement. This adds a little bit more randomness to the erratic motion to make it look less robotic.
- Phase: The offset in time of the movement. You can use this if you want to apply the motion effect twice, to the eyes and the entire head. The head typically moves a bit slower, so you can reduce the phase of the effect on the head to make the character look around realistically.
- Smoothness: How smoothly the gaze changes every couple of moments.
# Sample Usage
# Synchronized Eye and Head Movement
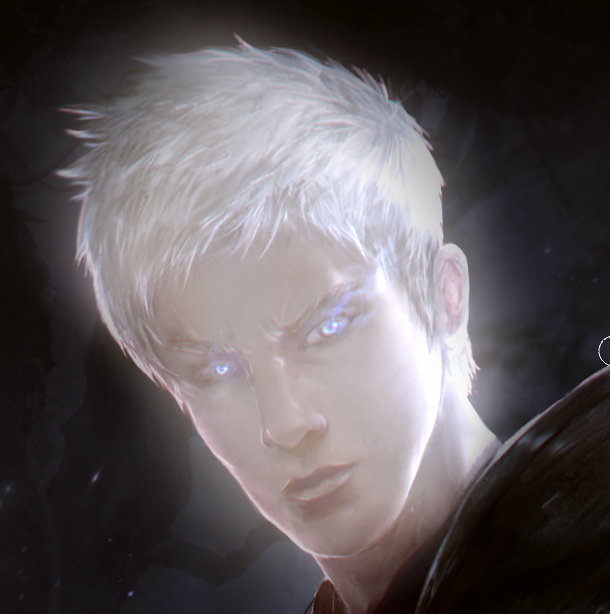
Just as shown in the preview image above, this effect can be used to create random eye movement and random head movements. In this guide we will showcase how to use two iris movement effects to create a synchronized eye and head movement of a character.
# Eye Animation
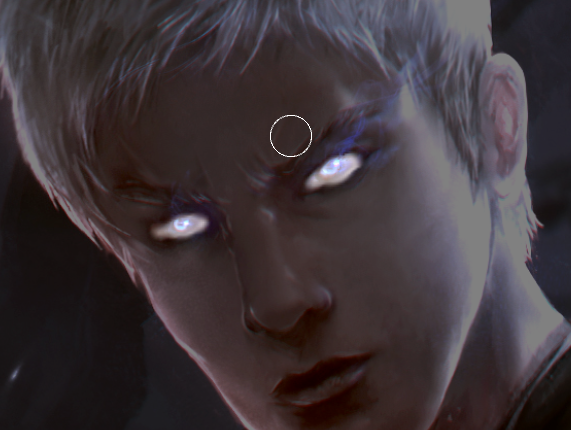
First, we have to create the eye animation. Add an Iris Movement effect to your image, then create an Opacity Mask around the eyes of your character (notice how the eyes are painted in white):
In the next step, we slightly adjust the settings of the effect. Enable the Background option for the layer and choose a Background Color that matches the eyes of your character.
Since our character's eyes are not aligned perfectly horizontally, we change the Scale to 1.5 for the X axis and reduce it to 0.45 for the Y axis. You will need to adjust these values for your specific image, try setting lower values first and slightly increase them until the eye movement is strong enough to reach the corner of the eye without being excessive.
We also increase the Speed to 0.6 to increase the eye movement slightly in our example.
# Head Animation
In the second step, we create a new Iris Movement effect on the same layer. Be sure to give it an appropriate name such as Head Movement so that you can differentiate the two effects at first glance in the future. Paint the opacity mask for this version of the effect around the head of your character:
You will have to adjust the settings a bit as well. First of all, it's important that the Speed setting matches the Speed setting value of the iris movement exactly to ensure that the head and eye movement stay synchronized.
Additionally, we increase the Smoothness and reduce the Phase option a little. Since the head should not move as abruptly as the eyes, so we increase the Smoothness option for the head. Setting the Phase a small negative number will make the head lag behind the eye movement slightly, which makes the movement appear more natural.
The two effects then combine into a result that looks something like this: