# Character Sheets
A more advanced way to create puppet warp animations can be done with character sheets. Character sheets require you to use a cut-up version of your character which separates your character into its different limbs / pieces. This allows for more complex and more accurate animations to be created as parts can freely move and overlap without the image becoming distorted. It is not necessary to achieve good results with puppet warp but it can make a big difference depending on what you want to do. You can still follow along the other tutorials of the puppet warp section, even if you don't rely on character sheets.
You should have read and understood the Puppet Warp Introduction Guide before attempting this tutorial.
# Creating a Character Sheet
Make sure to separate each individual body and clothing part into their own separate element and put them onto the same image. Try to keep the resolution of the image as small as possible and try to keep the amount of transparent/invisible space on the image as small as possible. For example, don't line up all limbs in a row, but rather place them into a square.
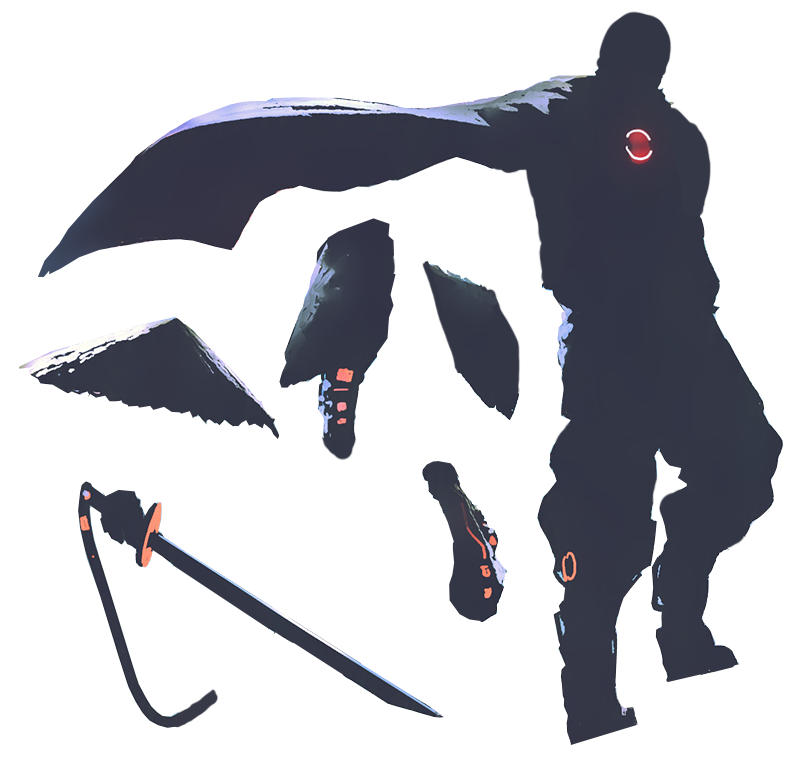
In our example, we use the samurai character from our previous puppet warping tutorials and cut it up into its own character sheet using a photo editing tool. Our character sheet looks as follows (you can use the following image file to follow along):
# Using Wallpaper Engine to create a Character Sheet
Wallpaper Engine comes with a character sheet creation tool which you can use to create a character sheet with relative ease. See our character sheet creation tutorial here:
# Preparing the character sheet
# Character Geometry
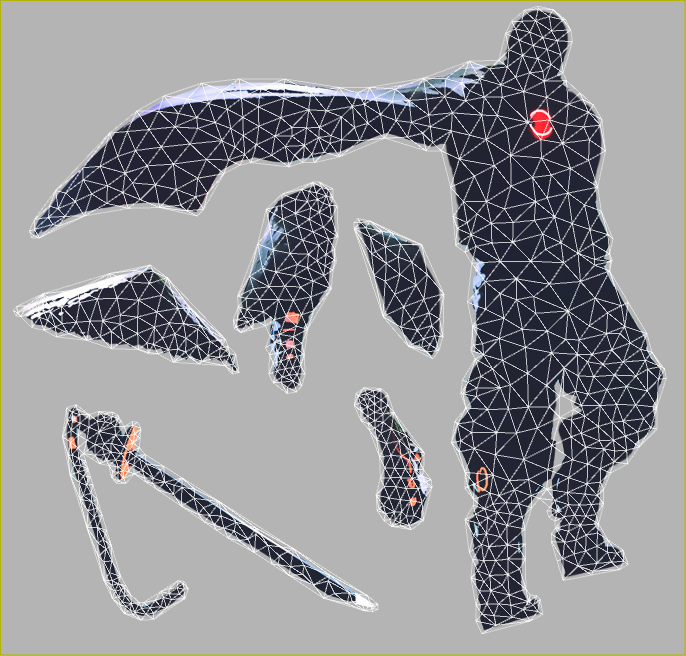
Just like with a puppet warp that is based on a non-cut-up character, we have to go through all the same steps as in the introductory guide to puppet warping. First we have to establish the geometry of the object. It should not be necessary to create slices here as explained in the introduction tutorial, as the slices are now redundant, as all parts of your character should be clearly separated:
# Character Skeleton
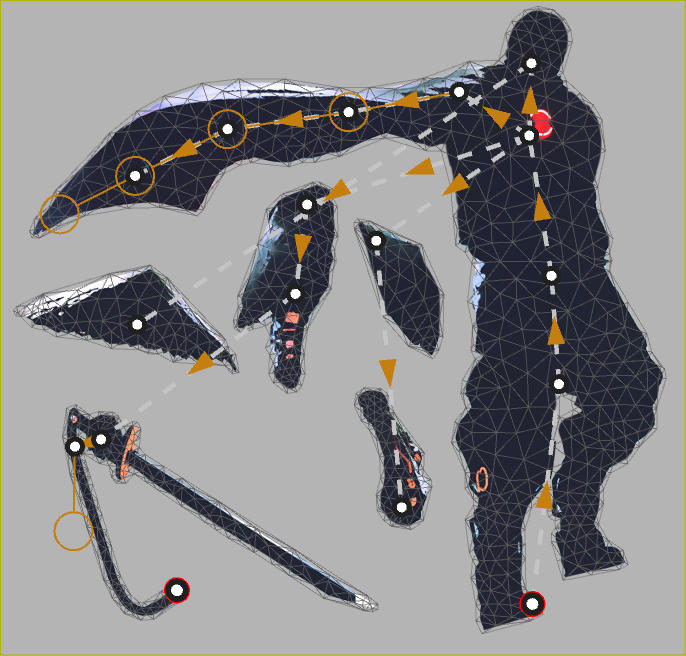
When creating the bones of the character, make sure to keep the correct order of bones intact. For example, the arms and the head are connected to the bone in the upper body area, while the hat bone is connected to head bone. Repeat this until each body part is connected to its respective neighbor:
# Character Weights
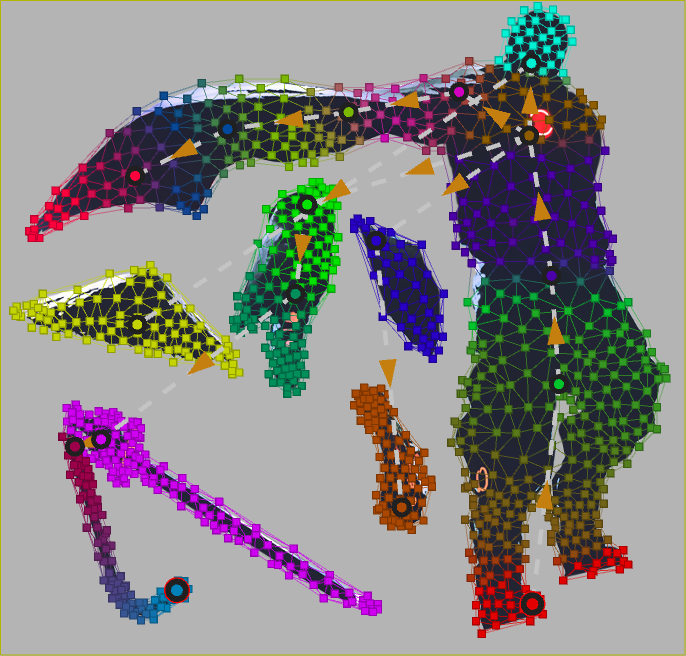
Painting the weights of the character should be much easier using a character sheet, as the regions of your character should now be clearly separate. For example, you can see how the hat and the sword have clearly been painted as one color which would not have been very simple to do in the original version of the model. You can also see how we have separated some elements into different regions nonetheless. For example: The rope, the cape and the legs have been separated into different bones to allow for more precise animations to be created:
# Blending across weight islands
The downside of this implementation is that now you may notice that certain limbs might even feel too separated from their neighboring limbs. This can result in very sharp transitions between them. To exemplify this, see the following video which showcases a harsh separation between limbs in the part labelled OLD:
In the part of the video labelled NEW, we have reconnected the relevant limbs by painting the weights from one limb onto the connected area of the other limb and vice-versa. This may sound a little confusing at first, but take a look at the red arrows showing the connected areas of the body:

You can see how we painted the yellow color of the character's chest onto the connected parts of both arms. And in return, we have painted the color of the arms onto the chest in the areas where they connect.
This mainly makes sense for body parts and clothing which would naturally stretch during movements so you do not have to do this for every limb.
# Reassembling the character sheet into a reference pose
Before you can start animating your character, you need to reassemble your character sheet into the original pose that you cut it out from. To do this, open up the puppet warp steps overview, towards the bottom of the list, you will find a button called Reference Pose in the Optional section.
Drag all parts of your character back to their original position to reassemble your character model to its original state. Use the Confirm button to save your reference pose.
This pose will be used as a starting point for your animations, which is why it is important to create it before actually animating your character.
# Utilizing a reference overlay for easier reassembly
In the Reference Pose settings, you can also import a reference overlay. This is essentially just an image of your character in assembled state, before it was turned into a character sheet.
After importing the image, make sure to enable the Visible option for your overlay and adjust the Opacity of the overlay to improve the visibility. You can now use the overlay as a reference on how to reassemble your character in a pixel-perfect manner.
# Animating the character
You can now animate the character just like in the introductory tutorial. However, the animations can be much more accurate as you have much more control over each individual body part since they now essentially act as separate layers on your model. Be sure to check out the following sections of the Puppet Warp chapter so some advanced animation examples we have created with this character sheet.
# Editing character sheets later on
While we strongly recommend that you finalize the character sheet before you start the animation process, you can still extend the character sheet later on. Take a look at the Extending an existing Puppet Warp to learn more about this feature.